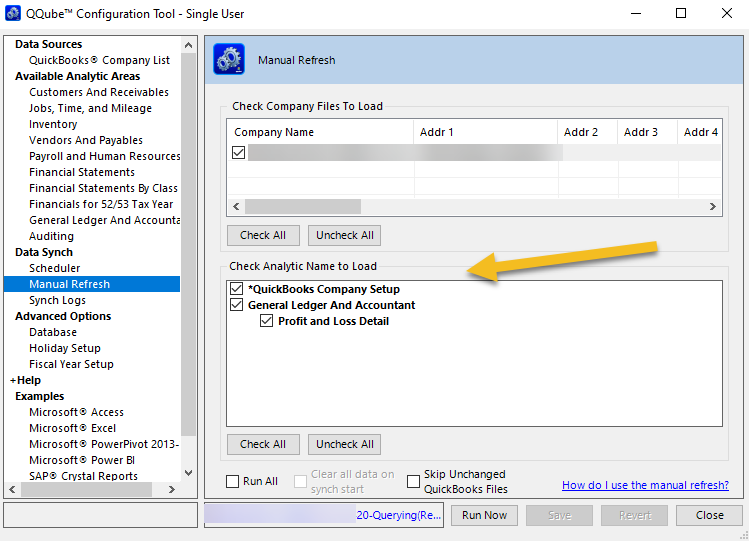
- Open the QQube Configuration tool and note (or take screenshots) of the Available Analytic Areas selected and the Analytic Names to Load

- Locate your QQube License ID and Password from the most recent purchase email from Clearify
- On the QQube Config Tool go to Help | About QQube to determine if your QQube subscription is active. If not, I recommend that you purchase the Subscription Renewal and install it along with the new license they will provide
- FYI this renewal purchase will be required once you move to QuickBooks 2022 or later
- If you decide not to do so, you will need the original installer, which hopefully was saved somewhere
- Deactivate the license on the currently installed server or PC
- See this link and scroll down to the section on Deactivation:
https://clearify.com/wiki/view/4264/licensing
- See this link and scroll down to the section on Deactivation:
- Get ready for the installation:
https://clearify.com/wiki/view/156/pre-install-requirements
https://clearify.com/wiki/view/157/installation - Then select the analytics you noted in item #1 (plus the default *QuickBooks Company Setup)
- Non-Urgent Load
- In Manual Refresh, uncheck all but *QuickBooks Company Setup
- File | Close/Log Off QuickBooks company file, but leave QB open
- Run the Manual Refresh in QQube – this will ensure that QQube can connect to QuickBooks autonomously
- If successful, check all the required analytics to load and click Save
- Set the Scheduler and click Save
- Let the Server do the heavy load of the initial sync overnight!
- Urgent Load
- In Manual Refresh, check all the required analytics including*QuickBooks Company Setup, click Save
- Click Run Now
If you need help, please try to schedule this migration in advance so we can be on standby!